purchased hostinger hosting but don’t know how to install free SSL certificate in hostinger hosting?
If yes, then watch this till the end, here in this step-by-step tutorial I will tell you how you can install the free SSL certificate on your blog in hostinger hosting.
let’s get into it without any issue.
Why do you need an SSL certificate?
An SSL certificate is a digital certificate that authenticates a website identity and enables an encrypted and secure connection.
SSL means Secure Sockets Layer, a security layer of your blog that creates an encrypted and most secure link between a web server and a web browser. It makes your website more safe and secure as compared to without SSL website.
Look at the below image for a better understanding of the SSL certificate.
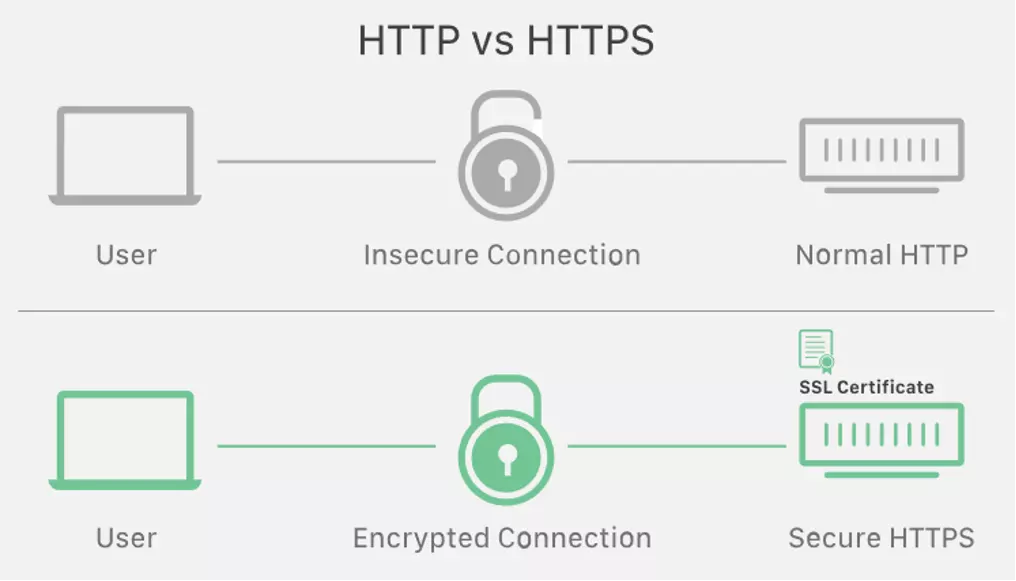
Not only this, but SSL also comes in a ranking factor these days. Google gives more preference to SSL activated sites as compared to non-SSL sites.
How to Install free SSL certificate on Hostinger
First of all, you need to visit hostinger.com.
Once you click on hostinger.com, you will get redirected to the hostinger sales page. Hostinger is always offering a huge discount to new customers. It will be a great saving of money if you are a new user of hostinger hosting.
Just click on the ‘Start now’ button.
Now you will get the plans of hostinger hosting. You have to choose a plan according to your budget and requirements.
Now, you have to select the best plans as per your budget allows and according to your site requirements.
If you have a very tight budget and want to start only 1 site initially to learn and implementing blogging stuff. Go for the single shared hosting plan. There you can host 1 website only and you can implement all the stuff that you learn.
This plan is perfect for people to learn blogging with practical stuff.
But if you have a budget to invest and you know how blogging works. then go for the premium shared hosting. This is the most popular and most recommended to everyone.
Here you can hosting many websites and also you will get a free top level domain name for free of cost.
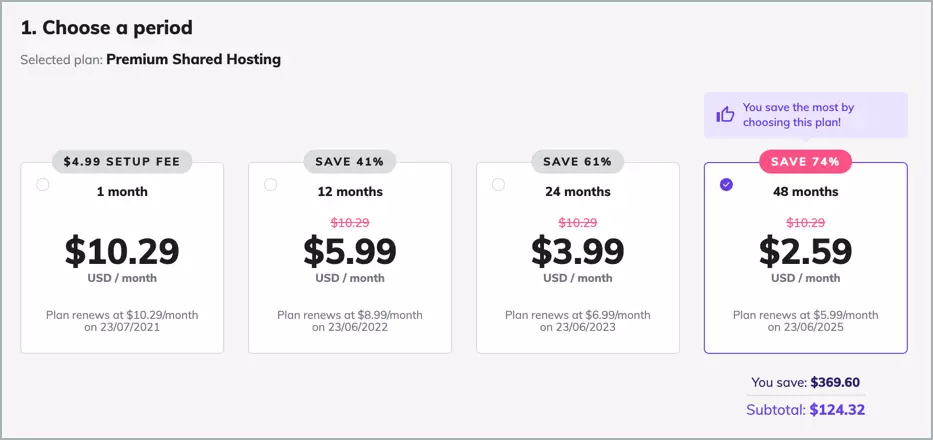
Before you checkout, make sure to check the time period for which you’re paying. By default, it’s selected at 48 months. If you choose to pay for 48 months, you’ll get the highest discount.
Note: The pricing plans shown on the homepage of Hostinger are when you purchase their hosting for 48 months. Pricing changes if you pay for less than 48 months.
after this, you have to enter your email address and other formal details to create your hostinger account. Then select the payment.
For more additional discounts, at the time of checkout use coupon code BLOGGINGQNA.
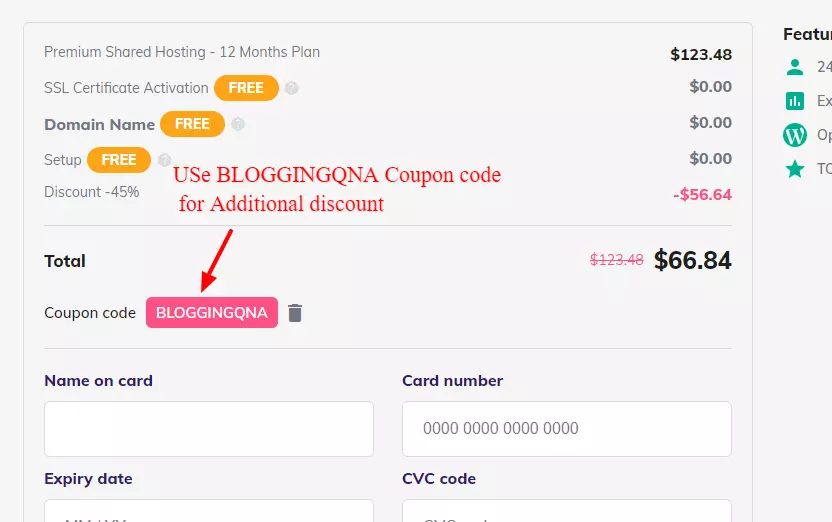
Complete the payment.
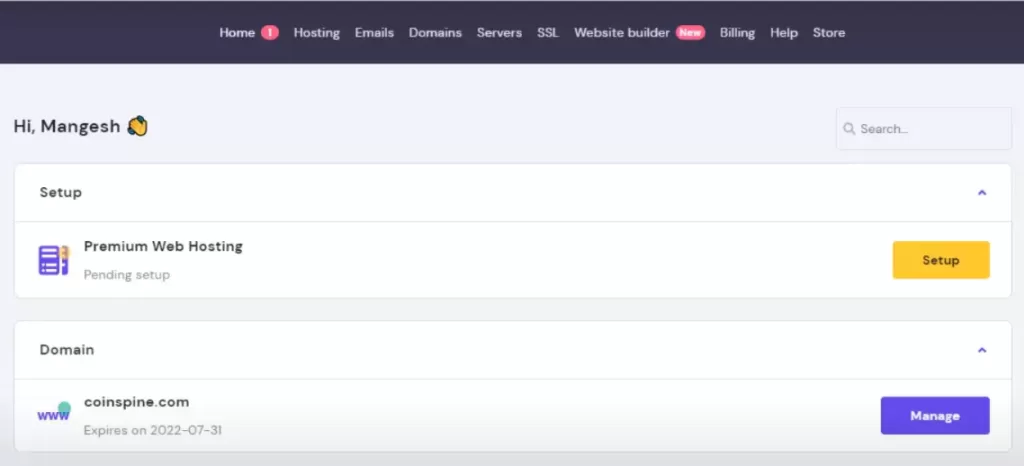
After successfully purchasing your hosting with Hostinger, you’re just a few clicks away from installing WordPress and creating your website.
Login to your Hostinger cPanel to activate your free SSL certificate.
now if the above menu option you will see an ssl option. just click on that and you will get redirected to SSL page from where we will activate the free SSL certificate on our website.
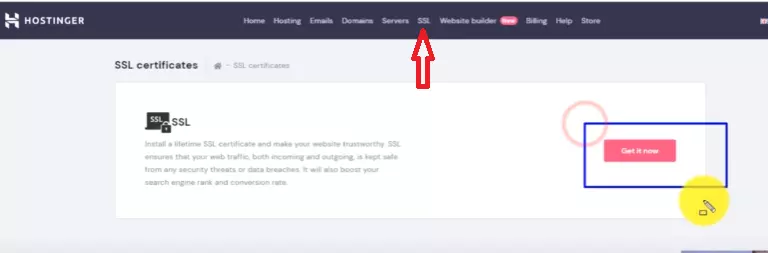
After clicking on “Get Now” you will see all the domains in your hostinger account that you have purchased. I front of that you will get an option to activate free ssl. Simply click on that and you are done.
This is the simple process that you need to follow in order to activate free SSL certificate on your blog.
Note:- If you are not able to see the free SSL certificate in your hosting. Then you need to contact the hostinger support team and tell them to activate your free SSL, and they will do it in few minutes.
This happened to me. Initially, there was no option for free SSL. they are asking for extra charges for SSL. Then I contacted the support team and they activated it free of cost.
Video Tutorial on Installing Free SSL
if you are able to configure it through above step by step guide, then you can watch the free tutorial. In the below-given tutorial, you will also get the step-by-step guide to install free SSL on Hostinger Hosting.
fAQs Related Installing Free SSL On Hostinger
below are some FAQs related to how to install a free SSL certificate in hostinger hosting.
Q1. How do I add free SSL to Hostinger?
Above in this article, you will get step by step guide to install Free ssl on your blog in hostinger hosting.
Q2. Does Hostinger offer free SSL?
Yes, Now hostinger provides a Free SSL certificate for all domains in all plans.
Q3. How do I enable SSL on Hostinger?
Click Here is the step-by-step video tutorial for that.
Q4. Is there any coupon code for Hostinger Hosting?
Yes, I have an amazing discount code for additional discount. Click here to visit the discounted page. At the time of checkout use coupon code BLOGGINGQNA for an additional discount.
Conclusion
Activating SSL Certificate with hostinger hosting is very easy now. I have shared all the step by step guides with screenshots. Just follow it and get your free SSL.
Also, the video tutorial is given, watch that if you face any issue.
I am sure, that your query is cleared now. Share this with others who are facing this issue. You every share appreciate our efforts.
And don’t forget to grab Hostinger Deal at the cheapest price. At the time of checkout use coupon code BLOGGINGQNA for an additional discount.
Thank You Mangesh Sir!! I had bought premium web hosting that provided SSL for a single main domain. I was upset, but suddenly I found this post…!! Just an amazing thing you have shared, thank you, brother…
Hi Mangesh,
It was an amazing article! Many people on my list often get confused about adding the SSL certificate. I am sure your article will help the ones who are using Hostinger. I am sure many readers must have learned a lot from this article, I found it very easy to understand and follow. I will definitely share it within my network to help fellow website owners. Looking forward to reading more of your amazing articles.